Chasing the Aurora: A First-Timer's Guide to Seeing the Northern Lights
The ultimate Northern Lights guide for beginners! Learn the best places to see the Aurora Borealis (Iceland, Norway, Alaska, Canada), the best time of year to travel, and step-by-step iPhone and DSLR camera settings for capturing stunning photos. Maximize your chances of seeing the lights with our essential tracking apps and pro tips.
ARCTIC
Chris Commisso
10/22/20259 min read
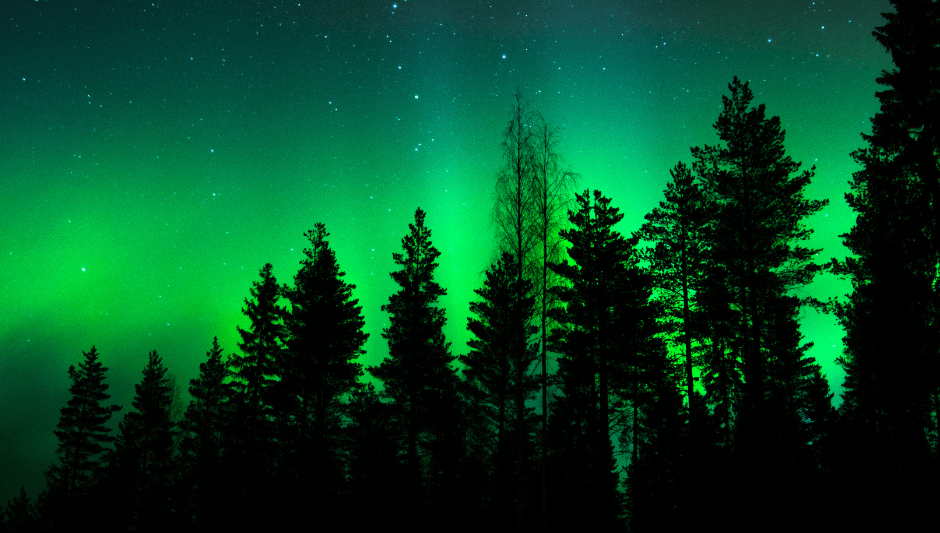

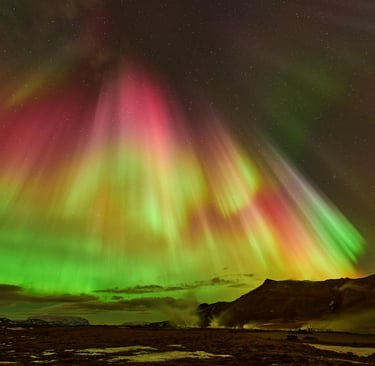
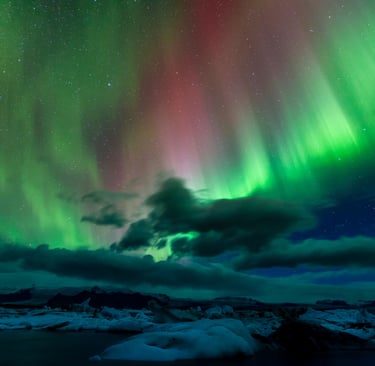
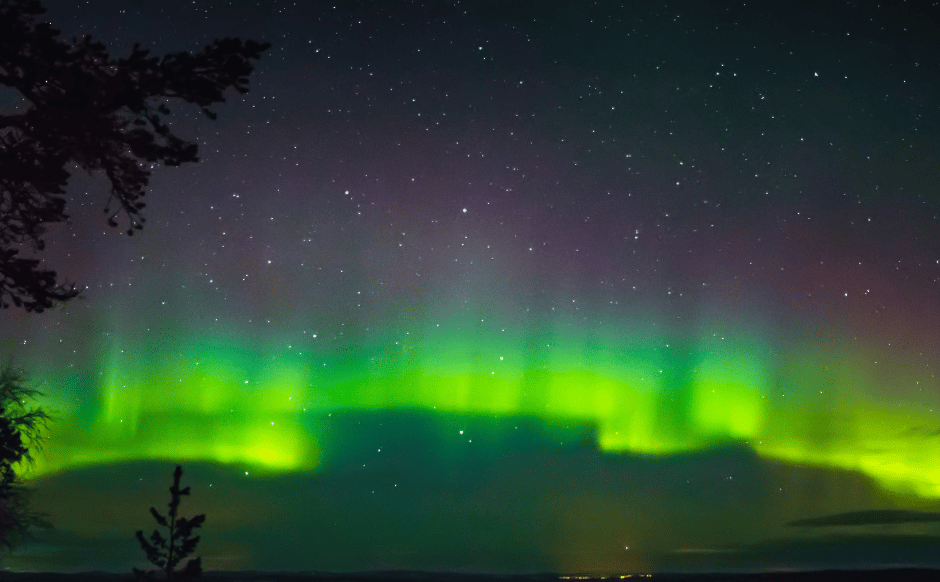
The Northern Lights, or Aurora Borealis, are nature's most spectacular light show. A dynamic light display of greens, pinks, and purples dancing across the polar skies, it's a phenomenon that draws adventurers from around the globe. Growing up in Northern Ontario, the Northern Lights were common to see on those cold dark nights, but for many, witnessing the Aurora is a profound, once-in-a-lifetime experience. How do you maximize your chances of seeing this elusive wonder?
At Glacial Expeditions, we specialize in journeys to the world's most breathtaking cold-weather destinations. We've helped countless travelers chase the magic, and we're here to equip you with the ultimate first-timer's guide to seeing the Northern Lights.

Where to Go: Your Aurora Hunting Grounds
While the Aurora can technically be seen anywhere within the "Aurora Oval" (a band around the magnetic poles), certain locations offer clearer skies, darker nights, and better infrastructure for viewing. Here are a few of our favorites.
Churchill, Manitoba, Canada: Known as the "Polar Bear Capital of the World," Churchill is also a prime Aurora viewing destination. Its remote location, flat landscape, and minimal light pollution make it ideal. Plus, you might spot polar bears or beluga whales depending on the season!
Fairbanks, Alaska, USA: Situated directly under the Aurora Oval, Fairbanks boasts high aurora activity and a longer viewing season. You can combine your aurora hunt with dog sledding, ice sculpting, or exploring the vast Alaskan wilderness.
Iceland: Highly accessible and incredibly popular, Iceland offers stunning volcanic landscapes as a backdrop to the lights. While weather can be fickle, tours are abundant, and you can combine your trip with hot springs, glaciers, and waterfalls.
Tromsø, Norway: Often called the "Gateway to the Arctic," Tromsø offers excellent chances to see the lights, along with a vibrant city experience. Fjord cruises, Sámi cultural experiences, and whale watching are popular daytime activities.
Lapland, Finland/Sweden: Picture this: a cozy glass igloo or a cabin in the snowy wilderness, with the Aurora dancing above. Lapland delivers on the fairytale experience, often combined with reindeer sleigh rides or visits to Santa Claus Villages.
Tracking the Aurora: Technology is Your Best Friend
The Aurora is a notoriously fickle phenomenon—sometimes brilliant, often elusive. To maximize your chances of witnessing the show, modern technology is helpful. Your greatest tool? Your smartphone.
While a high Kp-index (the measure of geomagnetic activity) is a good start, you also need clear, dark skies, and you need to know exactly when a surge in solar wind is about to hit. Thankfully, a variety of excellent apps can turn your iPhone into a real-time Aurora tracker.
Among the best options, you'll find apps designed to cater to different levels of expertise. For those who want a simple forecast, My Aurora Forecast & Alerts is a favorite, providing a clear percentage chance of seeing the lights at your specific location and sending helpful push notifications when activity is high. If you value real-time, ground-level information, Hello Aurora is invaluable; it includes a map powered by community sightings, where other users post photos and locations immediately after spotting the lights.
For the serious tracker, apps like Aurora Alerts and SpaceWeatherLive offer much more detail, allowing you to track specific solar wind parameters and customize alerts based on the exact Kp index you are waiting for. Ultimately, by combining the geomagnetic data provided by these apps with a reliable cloud cover forecast, you equip yourself with the best possible chance of catching the dynamic light display.
Pro-Tip for Usage
No matter which app you choose, remember that seeing the lights requires two key factors:
Strong Auroral Activity: The app will show you this via the Kp index and solar wind data.
Clear Skies: The best apps will also integrate cloud cover forecasts, as even the strongest aurora is invisible behind thick clouds!
Use the app to know when to look, and a reliable weather forecast/cloud map to know where to look for a clear view.
Ignore the Apps: Simplify Your Hunt
The single best piece of advice for any first-time Aurora hunter is to avoid frantic tracking. While the apps mentioned above provide invaluable data, the most effective tool in your arsenal is often the simplest: your hotel's front desk or concierge. If you're staying at an Arctic lodge or a hotel that regularly hosts Aurora guests, ask if they offer an "Aurora Wake-Up Call" service. This courtesy allows you to put your name on a list and get a call directly to your room—even in the middle of the night—the moment a staff member spots a strong display. This way, you don't have to monitor the Kp index or cloud cover yourself; you can relax, knowing a local expert has the watch, and you'll only leave your warm bed when the celestial show is truly on.
When to Go: Timing Your Trip for Success
The Aurora requires two main ingredients: solar activity and dark, clear skies.
The Best Time of Year: Your prime viewing window is typically late September to late March. During these months, the Arctic experiences long periods of darkness, which are essential for seeing the lights. The darkest months (December and January) offer the longest viewing opportunities each night.
Avoid the Full Moon: While not a deal-breaker, a full moon can brighten the sky and make fainter auroras harder to see. Check moon phase calendars when planning if you want the absolute darkest conditions.
Stay Longer: The Aurora is unpredictable. We recommend a trip duration of at least 5-7 nights to increase your chances. This allows for cloudy nights or periods of low solar activity.

Gear Up: Essential Photography Tips
A decade ago, capturing the Aurora required a bulky camera and technical know-how. Today, the choice between a dedicated DSLR/mirrorless camera and your iPhone is a common one.
For the serious photographer, the DSLR or mirrorless camera remains the champion. It gives you full manual control over shutter speed (for those long exposures), aperture, and ISO, resulting in crisp, high-resolution, and perfectly exposed photos. If your goal is a portfolio-quality image with stars and landscapes defined, stick with the tripod-mounted DSLR.
However, for the casual traveler, the iPhone is a surprisingly capable alternative—especially newer models. While you don't get the same fine control, you can still capture memorable shots:
iPhone Pro Models (11 and newer): These phones have a dedicated Night Mode that automatically uses long exposure (up to 30 seconds when mounted on a tripod) to capture faint light.
Third-Party Apps: Apps like Northern Lights Photo Capture or similar manual camera apps allow you to gain some control over shutter speed and ISO, pushing the phone's camera further.
The Key: Whether using an iPhone or a DSLR, a sturdy tripod is non-negotiable. Any movement during a long exposure will blur the lights completely. The lights you see on your phone screen might look faint, but your camera's long exposure capability will dramatically reveal the vibrant greens and purples.
In short: Use the DSLR for stunning, professional results, and use the iPhone for quick, easy, and sharable memories that are also stunning.
DSLR Set-up
Capturing the Aurora on camera is a skill, but with the right gear and settings, even a beginner can achieve stunning results.
Camera: A DSLR or mirrorless camera with manual settings.
Wide-Angle Lens: A fast wide-angle lens (e.g., f/2.8 or wider, 14-24mm) will let in more light and capture more of the sky.
Sturdy Tripod: Non-negotiable! Long exposures require a perfectly steady camera.
Remote Shutter Release: Prevents camera shake when pressing the shutter button.
Extra Batteries: Cold weather drains batteries incredibly fast. Keep spares warm in an inside pocket.
Headlamp with Red Light Mode: Helps you see without ruining your night vision or disturbing others.
Basic Camera Settings:
Manual Mode (M): Full control over your settings.
Focus: Manual focus to infinity. Set it during the day or on a distant light source, then lock it.
ISO: Start around 800-3200 (adjust based on light conditions and camera noise).
Aperture: As wide open as your lens allows (e.g., f/2.8, f/4).
Shutter Speed: Begin with 15-30 seconds. Adjust shorter for brighter, faster-moving auroras, longer for fainter ones.
White Balance: Auto or a cooler setting like 3200K (Tungsten) for vibrant colors.
Pro Tip: Take a few test shots without the Aurora to check your focus and exposure. Recently, using the Arsenal Intelligent Camera Assistant has delivered great results!
iPhone Set-up
If you're using an iPhone (Model 11 or newer), you have an incredible tool right in your pocket that can capture the Northern Lights without complicated manual settings. The key is using the phone's native Night Mode and, crucially, keeping it completely still.
The Non-Negotiable Setup
The most critical step to getting a great Aurora photo with your phone is stabilization.
Get a Tripod: You cannot hold the phone still enough for the 3 to 30-second exposure time. A small, portable phone tripod or a flexible Gorillapod is an absolute necessity.
Turn Off the Flash: Ensure the flash is completely off (the lightning bolt icon should have a slash through it).
Use the 1x Lens: While the wide-angle lens can capture a lot of the sky, the standard 1x (Wide) lens is superior in low-light conditions.
Step-by-Step Instructions (Using Night Mode)
The iPhone's smart software will do the hard work for you, but you need to guide it:
Open the Camera App and point it toward the Aurora.
Night Mode Activates: The camera will automatically detect the low light and activate Night Mode. You will see a small crescent moon icon turn yellow, usually in the top-left corner.
Adjust the Timer: Tap the small arrow at the top of the screen to open the settings menu at the bottom. Tap the Night Mode icon (the crescent moon) in the new bottom menu.
Maximize the Exposure: A slider will appear. Since your phone is mounted on a tripod, the exposure time will likely default to 10 seconds or higher. Slide this timer all the way to 'Max' (Maximum), which should be 30 seconds on a completely stable surface.
Set Focus (Optional but Recommended): Tap and hold on a very bright distant object (like the moon, a distant star, or a bright streetlight far away) until you see AE/AF Lock appear at the top. This prevents the phone from trying to refocus during the long exposure.
Take the Photo: Press the shutter button. Crucially, use the timer feature (3 or 10 seconds) or a remote shutter if possible. This prevents the physical act of touching the phone from blurring the shot.
Wait and Watch: Do not touch the phone until the 30-second countdown is complete.
The final image will often look dramatically brighter and greener than what you saw on the screen, revealing the true colors of the Aurora!
What if the Lights Don't Show Up?
This is the golden question. The Aurora is a natural phenomenon, and there are no guarantees.
Embrace Other Arctic Wonders: Dog sledding, snowmobiling, ice fishing, visiting indigenous communities, exploring glaciers, or whale watching are incredible experiences. Many destinations offer unique cultural insights and breathtaking landscapes that will more than make up for it.
Flexibility with Tours: Many guided Aurora tours offer a "no-show" policy, sometimes allowing you to join another tour on a different night if space permits, or offering a partial refund for that specific tour (always check terms and conditions).
Cruising for Aurora: Hurtigruten's Northern Lights Promise offers a free voyage if the aurora is not sighted on an 11-day or longer coastal voyage during the season (September 20 to March 31)
Stay Positive: The magic of the Arctic extends far beyond the lights. Enjoy the crisp air, the vast silent landscapes, and the unique activities available. Sometimes, the unexpected moments are the most memorable.
Ready to Chase the Magic?
Seeing the Northern Lights is a remarkably rewarding travel experience. It's a chance to witness one of nature's greatest shows, creating memories you'll treasure long after you return home. With smart planning, the right location, and the simple tracking tips we've covered, you dramatically increase your chances of seeing the Aurora dance.
If you feel ready to turn the dream of a successful Aurora hunt into a reality, we can help.
Explore our upcoming Arctic expeditions and let Glacial Expeditions help you plan your unforgettable journey to the top of the world.
© 2024 Journey with Erika LLC | All Rights Reserved
Erika Commisso
Erika@JourneywithErika.com
920-404-1803
Chris Commisso
Chris@JourneywithErika.com
920-659-2960